Broadband Service
Simple Troubleshooting Guidelines
There are many possible reasons why you might not be able to access the Internet. Please refer to the following guidelines for troubleshooting.
- Please check whether the network cables are loose. Reconnect the cables on all devices after closing all the connected devices, and then turn on the devices to test;
- If you are using any network sharing device (router), please try unplugging the device and connecting your computer directly to our modem or wall-mounted network cable, and then carry out the testing;
- If the problem persists, or if you are not using any web sharing device, please switch to a different browser (such as Edge/Firefox/Chrome/IE) and a different device (such as another computer/mobile phone/tablet) for testing.
A disconnection problem during surfing may be related to loose network cables, network conditions and your computer’s settings. Please refer to the following guidelines to handle the problem.
- Please check the network cables for any possibility of poor contact. Reconnect the cables on all devices after closing all the connected devices, making sure that the cables are connected securely, and then turn on the devices for testing;
- If you are using any network sharing device (router), please try unplugging the device and connecting your computer directly to our modem or wall-mounted network cable, and then carry out the testing.
- If the disconnection problem is time-related (such as getting disconnected at night only or more frequently during a certain time period), please record it for further processing when you contact us.
- If your network service is equipped with a modem, please check whether the modem's indicator light changes abnormally when the disconnection occurs. If so, please record it for further processing when you contact us.
- If you connect your computer directly to our modem and the disconnection problem persists, please check whether any unusual message appears on the computer screen when the disconnection occurs. If so, please record it for further processing when you contact us.
Internet speeds may be slow for many reasons. Please see the explanation below:
- The computer’s hard disk storage space and CPU speed are insufficient, which may cause overloading of the CPU and slow down Internet speed;
- Multiple programs are enabled simultaneously;
- Many users may be connected to the same server and downloading the same data at the same time. This will affect Internet speed if the URL cannot cope with the large number of download requests in time;
- If you connect to our broadband network through a USB port, the Internet speed will be reduced due to sharing of resources at the USB port (when the USB port connects to a printer simultaneously, for example); therefore, we recommend that you connect to the broadband network using an Ethernet card;
- If a wireless router or broadband sharing device is used and connected to multiple Internet devices simultaneously, the Internet speed will be affected.
No. Our system will automatically assign you the right information so that you can access the Internet normally.
We do not restrict the types or manufacturers of the devices purchased by our customers; therefore, your normal use of network services won’t be affected in general. However, the hardware specifications of the network sharing device may limit the network functions available to you. It is recommended that you inform the sales staff of the relevant information regarding your services before purchasing related devices, so that they can help you choose the most suitable devices.
PPPoE Connection Settings
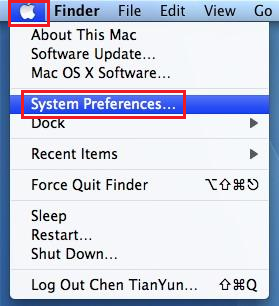
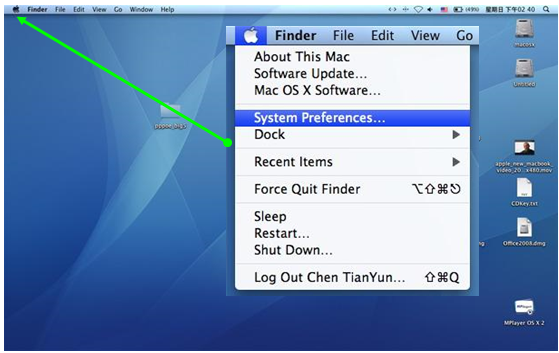
1. Click the Apple icon at the top left corner and then select “System preferences”.
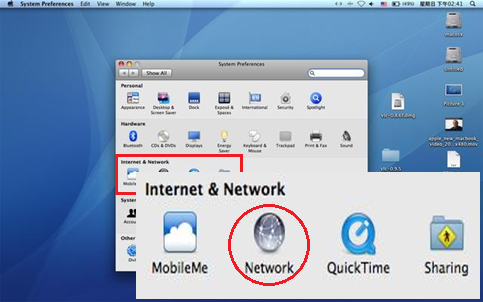
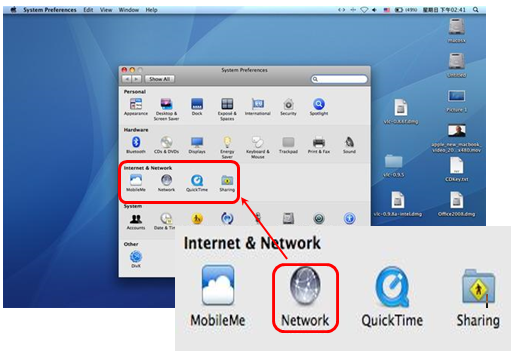
2. Select and open the “Network” icon under “Internet & network”.
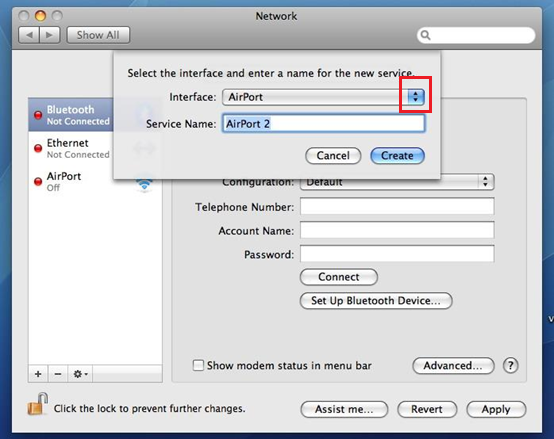
3. Click the “+” sign at the lower left corner in the network window.

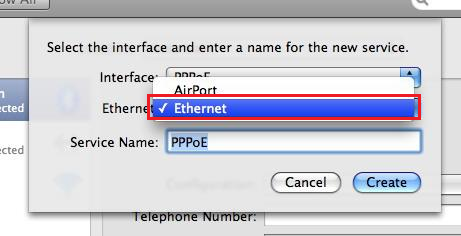
4. Click “Interface” and select “PPPoE” in the new window that comes up.
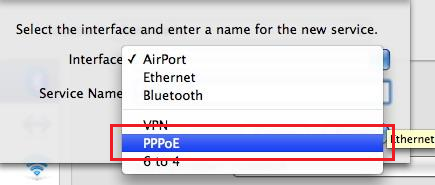
5. After selecting “PPPoE”, the new option “Ethernet network” will appear in the current window. Select “Ethernet network” and then click “Create” in “Ethernet network”.
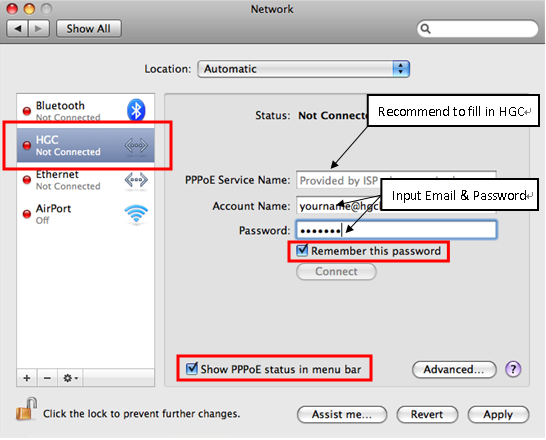
6. The “PPPoE” connection that was just created will appear on the left side of the Web interface. After clicking it, the location where the user fills in the online data will appear. After filling in all the data, click “Apply” and then click “Connect”.
7. If the password is input incorrectly, the following prompt will appear. You can browse the web after successfully entering the password.
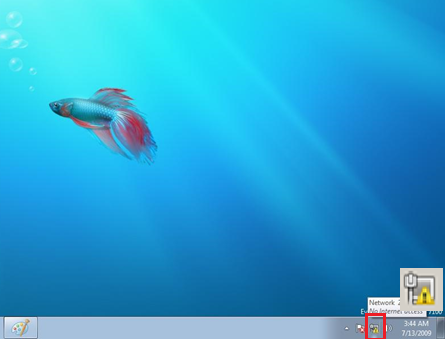
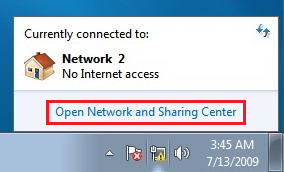
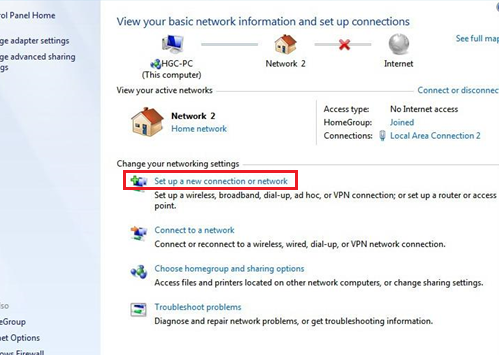
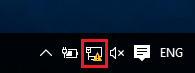
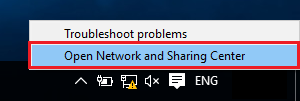
1. Left-click or right-click the “Computer icon” at the lower right corner of the computer, then select “Open network and sharing center”.
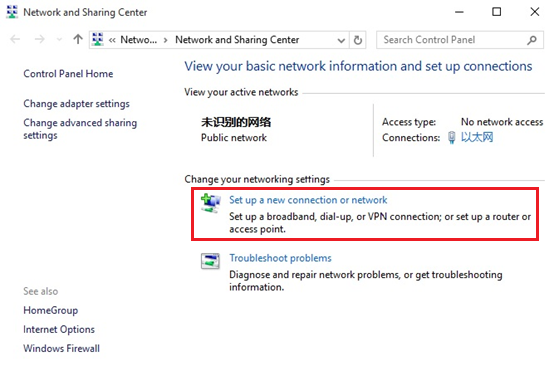
2. Select “Set up a new connection or network” below.
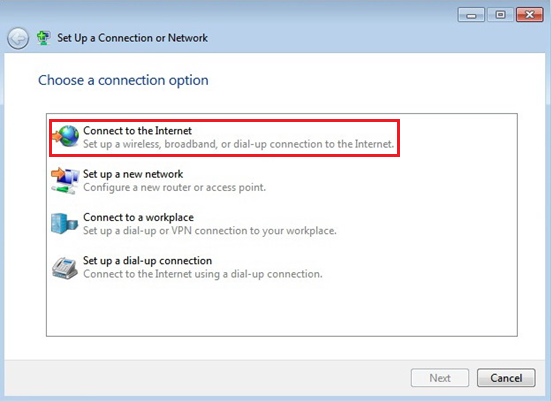
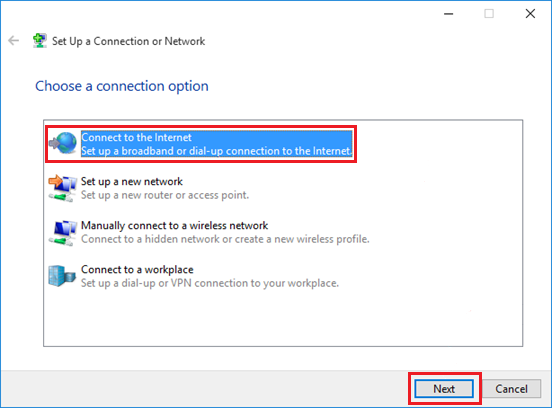
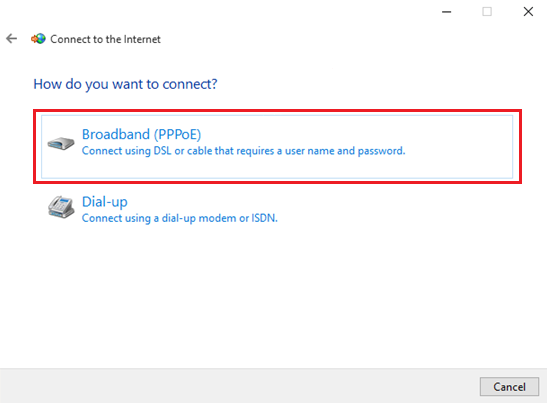
3. Select “Connect to the Internet” and click “Next”.
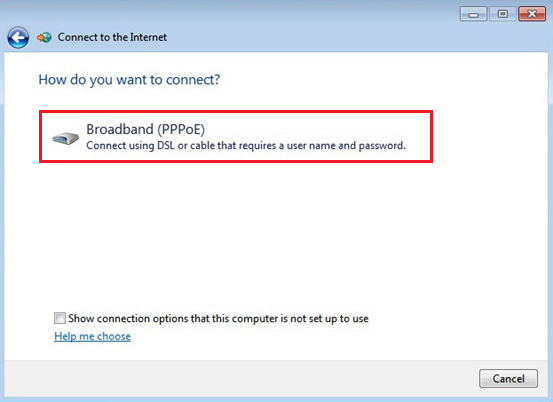
4. Select “Broadband (PPPoE) (R)”.
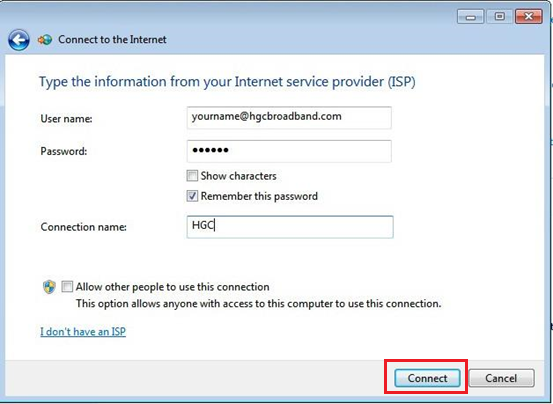
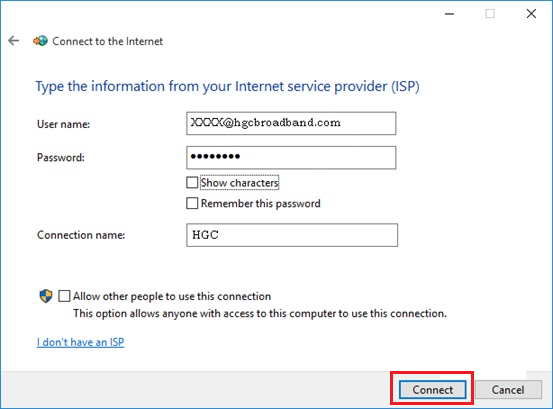
5. Fill in the “Username” and “Password”, type “HGC” in “Connection name” and click “Connect”.
6. Wait for successful connection.
7. After successfully connecting, test the network status.
1. Left-click or right-click the “Computer” icon” at the lower right corner of the computer, then select “Open network and sharing center”.
2. Select “Set up a new connection or network” below.
3. Select “Connect to the Internet” and click “Next”.
4. Select “Broadband (PPPoE) (R)”
5. Fill in the “Username” and “Password”, type “HGC” in “Connection name” and click “Connect”.
6. Wait for successful connection.
7. After successfully connecting, test the network status.
Router Settings
1. Download and install the TP-Link Deco app first.

Scan the QR code below with your mobile phone or go to the Google Play store or Apple App Store to search for “Deco”, then download and install it on your Android or iOS smartphone or tablet (it cannot be downloaded from the iOS Chinese server).
After successfully installing the app, log in with your TP-Link ID when you open it for the first time. If you don't have a TP-link ID, click “Sign Up”. The app will guide you through the rest of the operations.

※If you are a user of the HGC Wi-Fi 360 service plan, the technician will help you with the initial setup when he visits and installs it for you.
※The technician will help you set up the related TP-Link ID. Generally, the email address provided by our company will be used as the TP-Link ID to facilitate future management.
2. After logging in with the TP-Link ID, follow the app guide for further setup. You will be prompted to select your Deco model first. Select M5 and click “Continue”.
Then, the app will provide a guide related to the wiring and observation of various device indicators.

※Two network interfaces are provided on the Deco M5 router. As long as one of the interfaces is connected to the modem, the other interface is automatically converted to the output interface (that is, it can connect to computers and other Internet devices)

3. After connecting the line according to the guide, wait for the indicator on the top of the Deco M5 router to flash blue slowly.
If the color of the indicator shows otherwise, please click the reference of “Why does my LED indicator not show a pulsing blue?”

4. After the LED indicator flashes in blue slowly, click the option “DECO LED indicator is a pulsed blue indicator” and go to the next step to pair.
If Bluetooth is not enabled on your phone, the app will prompt you to switch on Bluetooth. Please follow the prompts.
After the Bluetooth is switched on, the app will further search for the nearby DECO M5 router. Please make sure it is not too far away.

5. After successfully searching for the DECO device, the app will ascertain the approximate location of your DECO. You can choose the default settings or create new ones in the custom settings.
Then, the app will ask you to set the Wi-Fi name and password of the DECO M5 router. Fill in as required.
After completion, the initial setup is finished and you can choose to continue adding other DECO devices or simply end setting up for now.
To set up other DECO devices, follow the guide below to proceed with the setup.
1) Click “+” at the top right corner of the app homepage

2) The app will guide you to connect and select the location of the current DECO you want to place.
3) If the Wi-Fi function of your mobile phone is not enabled, the app will prompt you to switch it on. After that, Wi-Fi will be used to make further settings.

4) After completing the settings according to the app’s prompts, the setup of your second DECO is complete and other devices can be set up in the same way.


1. Connect the relevant lines according to the illustration.
a. Lines connected to a modem or wall socket should be connected to the “Internet” interface of the router; (see Figure ①)
b. Connect your personal computer to the router's network interface (LAN) with a network cable; LAN 1 - 4 can be used; (see Figure ①)
c. If you want to set up the router via a wireless (Wi-Fi) device, please refer to the information at the bottom of the router to check the name and password of the default wireless signal (see Figure ②);


The SSID in the volume label is the default wireless network name;
Wireless Password/PIN is the default wireless network password.
2. After confirming that the lines are properly connected or the wireless connection is successful, please open the computer or mobile browser (such as Internet Explorer, Safari or Chrome), enter 192.168.0.1 or tplinkwifi.net in the address bar, and press Enter to open the router login screen.
Enter the default username “admin” and password “admin”, and press “Login” to log in.

3. You will be prompted to change to a new username and new password. (The username and password are used to log in to the router setting page and are not directly related to broadband usage)
If no change is necessary, press (X) at the upper right corner to close;
If you need to make changes, please fill in the new username and new password, then press “Confirm”.
4. Enter the Quick Setup screen, select Time Zone as GMT+08:00 and press Next.
5. Select the appropriate Internet Connection Type and press Next.
If you are not sure, press Auto Detect or contact us.

6. Check the “Do NOT Clone MAC Address” option and click Next to proceed.

7. You will be prompted to change the default wireless network name (Network Name, SSID) and password.
If no change is necessary, press Next directly.
If you want to make a change, please note the following two tips:
1) It is recommended to change the Network Name (SSID) of 2.4GHz Wireless and 5GHz Wireless to mutually different names, so that you can distinguish between the two signals in the future.
2) The password must consist of 8 ~ 63 English letters or numbers.
(Some symbols can also be used. If you enter a symbol that is not applicable, the system will prompt you)

8. The system will then automatically check the settings.
If they are correct and you have completed the relevant settings, press Save.
If you need to make changes, press Back to return to the previous step.

9. Finally, press Finish to complete the setup. It can then be used normally.
Email Settings (HGC and non-HGC)
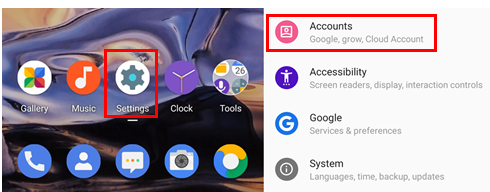
1. Go to “Settings” and click “Add account” in the “Passwords & Accounts”.

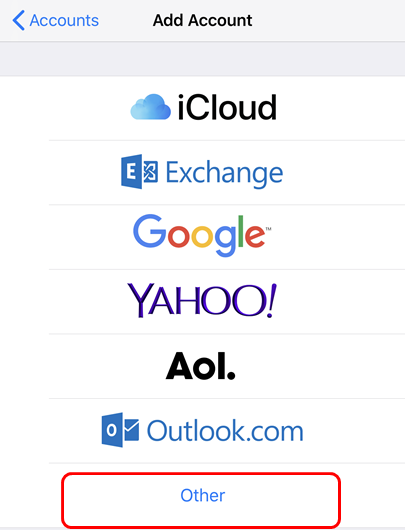
2. Select “Other” in “Add account”.
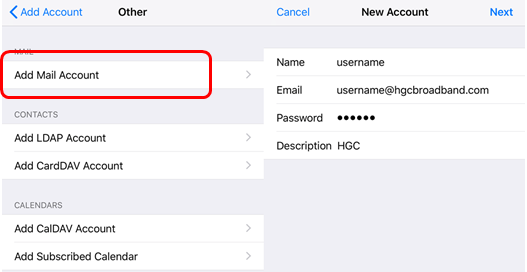
3. Select “Add mail account” and enter the name in the “New account” (the name of the email sender which customers must set themselves); the email address and password provided by HGC; fill in the “HGC” in the description and then press “Next.”
4. If the system prompts that the server settings are not responding, please set them manually.
The system will automatically detect the account type as “POP”. Please don’t select “IMAP”;
Enter “pop.hgcbroadband.com” in “Host name” of the incoming mail server,
and enter the username and password provided by HGC;
Enter “mail02.hgcbroadband.com” in “Host name” of the outgoing mail server,
and enter the username and password provided by HGC.
Click “Save” after filling in completely

5. After the settings are completed, the set HGC email will be displayed and emails can be sent and received normally.
1. Go to “Settings” and open “Users and Accounts”.
2. Click “Add Account” and then click “Personal (POP3)”.
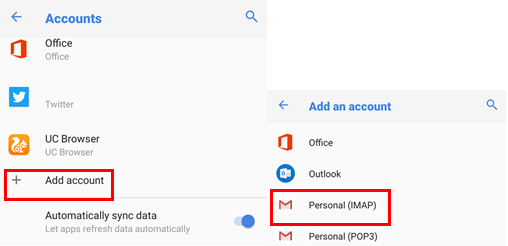
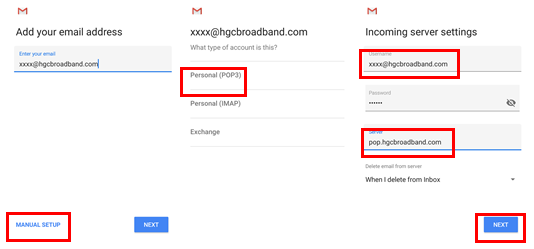
3. Fill in your email address and click “Manual settings”.
Select “Personal (POP3)” and enter your email password;
Fill in the incoming server address as “pop.hgcbroadband.com” in the “Server” column;
then, click “Next” to go to the next screen.
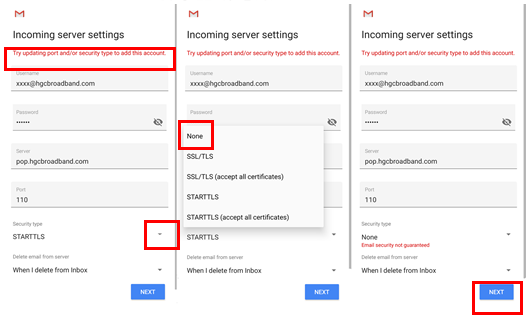
4. If the prompt “Try updating port and/or security type to add this account.” appears, click the arrow on the right side of “Security type” and select “None”, then click “Continue” to complete the incoming server settings.
5. Fill in your email address and password on the “Outgoing server settings” page.
Fill in the outgoing server address as “mail02.hgcbroadband.com” in the “SMTP Server”;
then, click “Next” to verify.

6. After successful verification, the system will request some related settings. Please set as required.
After the settings are complete, email can be used normally.
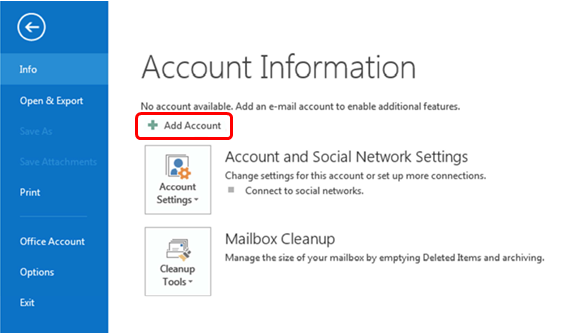
1. Select “Add account” in “Account information”.
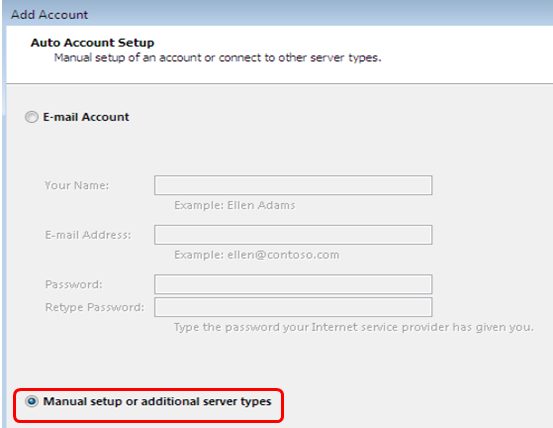
2. Select “Manually configure server settings or additional server types (M)” and click “Next”.
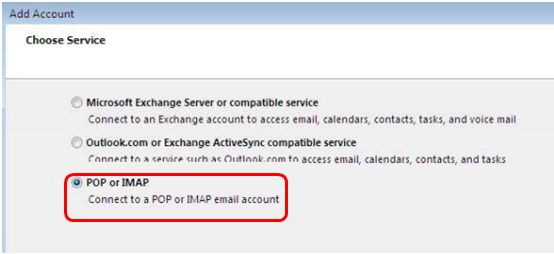
3. Then click “POP or IMAP(P)” and click “Next”.
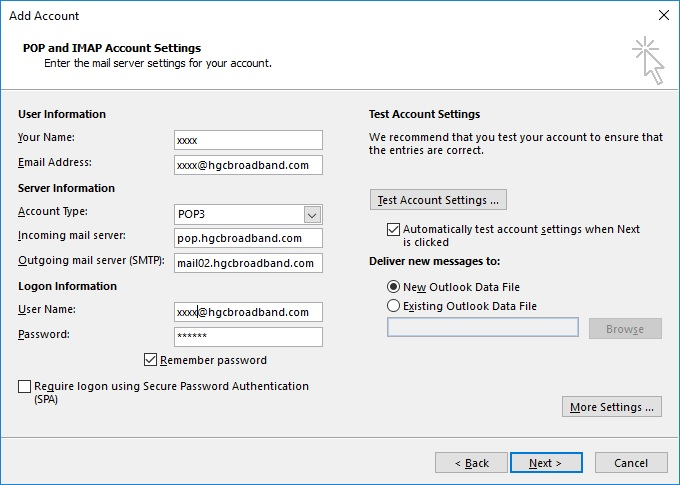
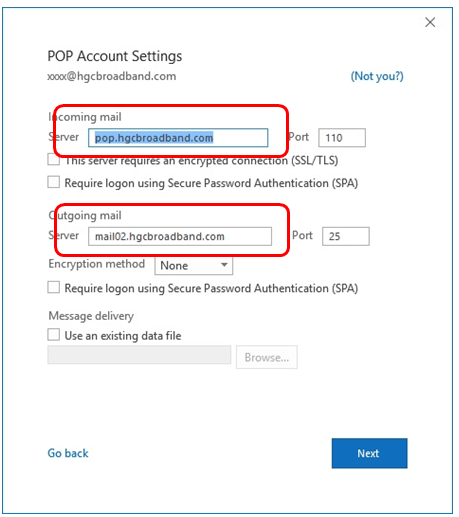
4. Enter the following user information in the “POP and IMAP account settings” interface:
- Your name (that is, the display name of the email sender) and the email address provided by HGC
- Account type: POP3
- For incoming mail server input pop.hgcbroadband.com
- For outgoing mail server (SMTP) input mail02.hgcbroadband.com
- Enter the username provided by HGC and select whether to “Remember password” as required
- It is not necessary to check “Require secure password verification (SPA) for login”. Confirm the entered data, and then press “More settings” to enter the further setting interface.
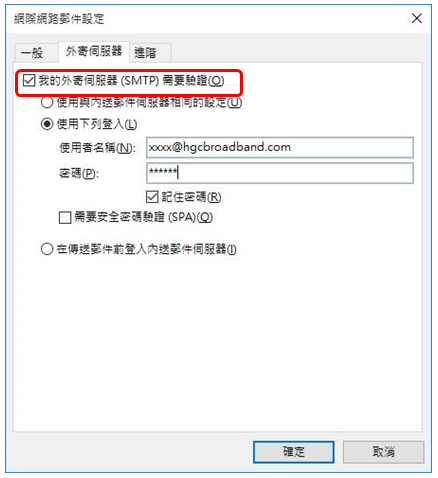
5. In the “Outgoing server” option, tick “√” in the “My outgoing server (SMTP) requires authentication”, select “Use the following login” and enter “Username” and “Password” (Note: fill in the HGC email address and password). Tick “√” on “Remember password” and press “OK”.
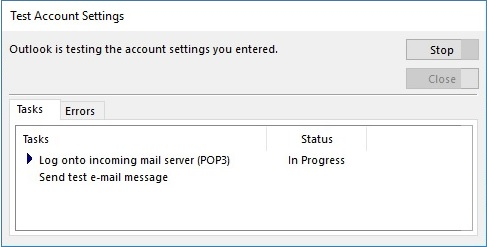
6. Finally, press “Next” to automatically test whether the account settings are normal.
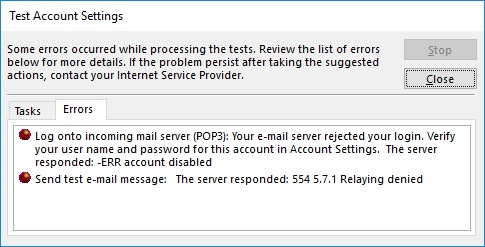
7. The following error prompt will appear when there is an error in the account settings or if there is a problem with the network connection. Check again if the steps in the above account settings are correct, or check whether the network is normal.
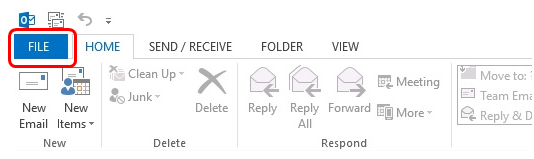
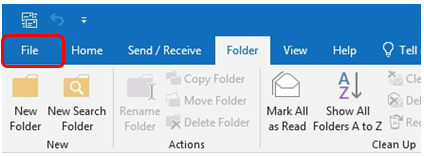
1. Open Microsoft Outlook 2016, click “File”.
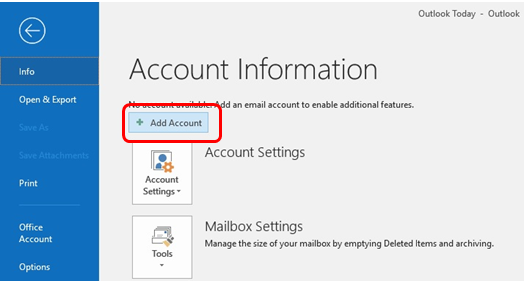
2. In “Info”, please click “Add Account”.
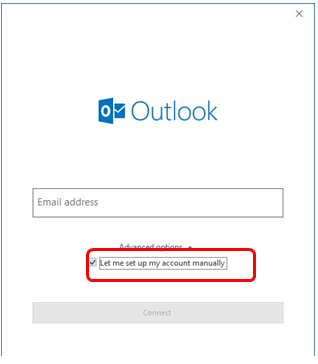
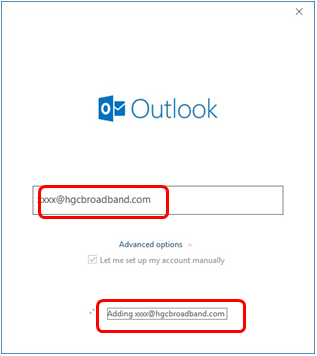
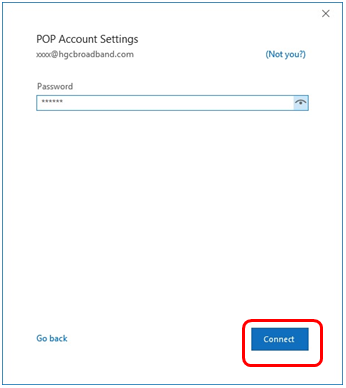
3. Fill in the Email address and tick “Let me set up my account manually” then click “connect”.
4. Click “POP” in this page.

5. Outlook will get the server setting automatically if your information is correct. If No, it will pop up a page to confirm the password with you first.
6. If the information is still incorrect, another page will show up to confirm with you. Please click “Change Account Settings” here to do some further settings.
7. Please double check the setting here. If still fail to access, please confirm the email account and your Internet status.
IP and DNS Address Inspection Steps
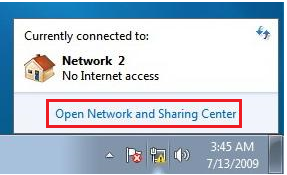
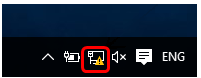
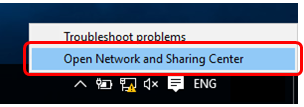
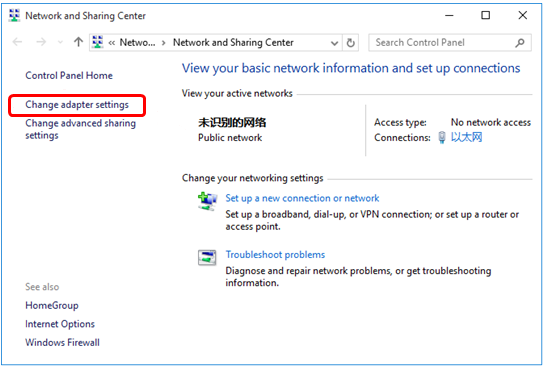
1. Left-click or right-click “Network” at the lower right corner of the desktop, then select “Open network and sharing center”.
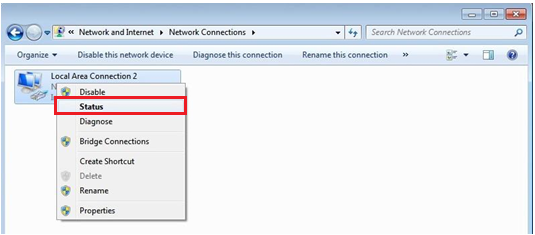
2. Select “Change network adapter settings”.

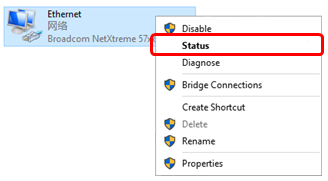
3. Right-click “Local connection”.
4. Click “Status”.
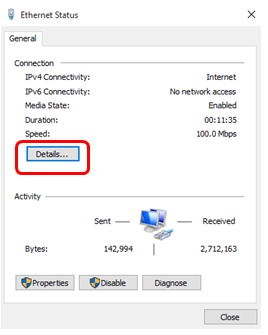
5. Click “Details”.
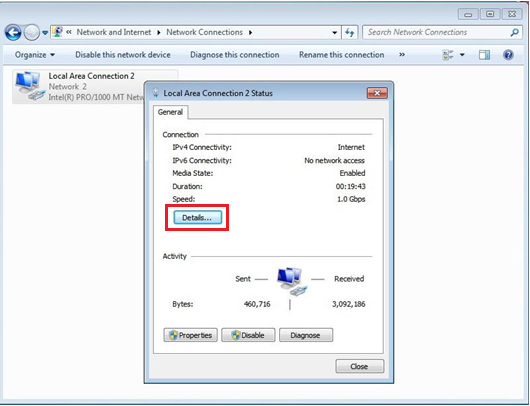
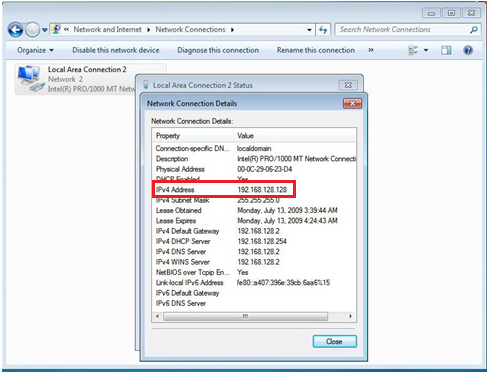
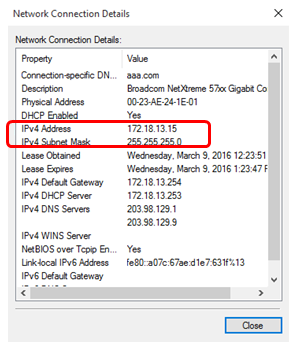
6. The IP address / physical address (MAC address) / DNS and other data can be checked here
1. Left-click or right-click “Network” at the lower right corner of the desktop, then select “Open network and sharing center”.
2. Select “Change network adapter settings”.
3. Right-click “Ethernet”.
4. Click “Status”.
5. Click “Details”.
6. The IP address / physical address (MAC address) / DNS and other data can be checked here
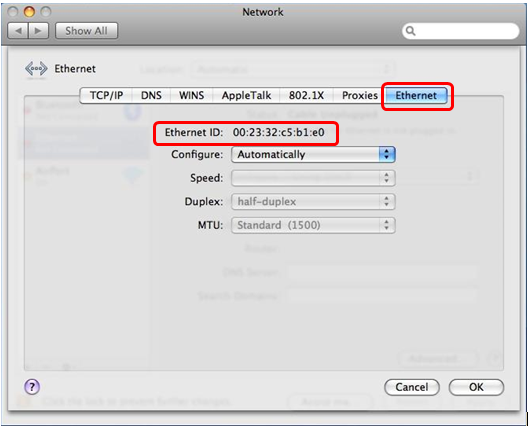
1. Click the “Apple” icon on the left upper corner and choose “System Preferences”.
2. Open the “Network” in “Internet & Network”.
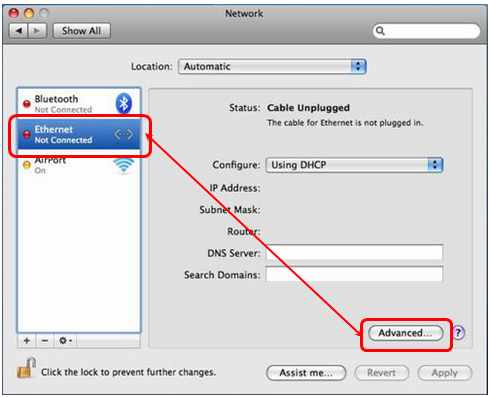
4. Click the button “TCP/IP” and the IP address will show in “IPv4 Address”.
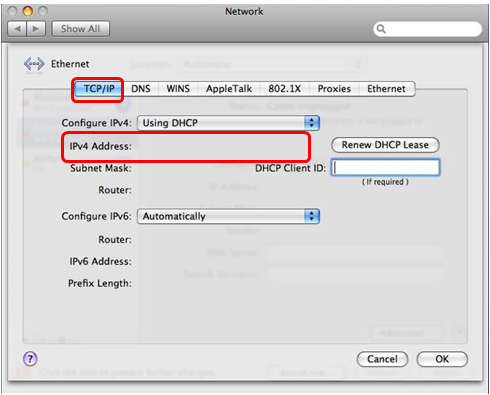
5. Click “Ethernet in this page then the physical address/MAC address will show in “Ethernet ID”.
Browser Settings
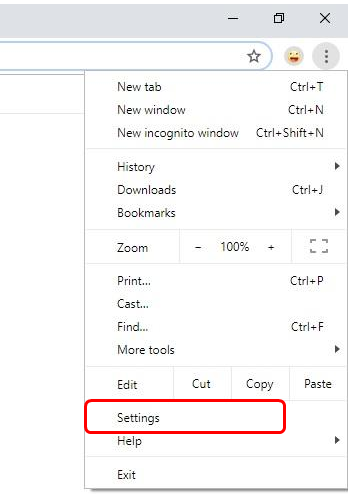
1. Open Google Chrome, select “┇ ” at the top right corner and select “Settings”.
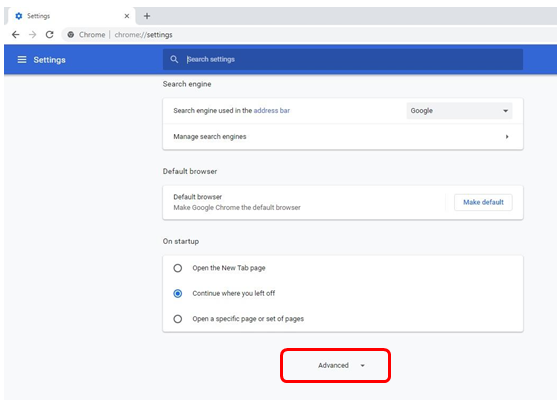
2. Select “Advanced” in the drop-down settings interface.
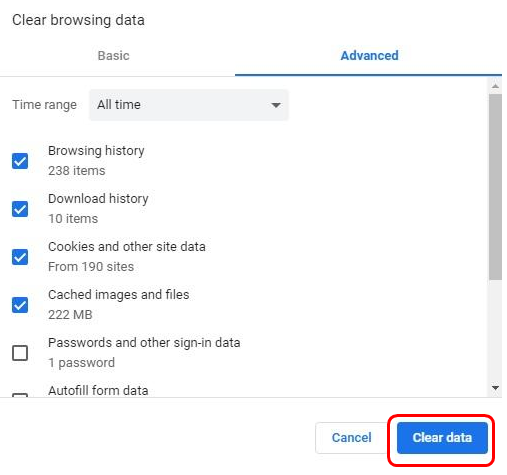
3. Select “Clear browsing data”.
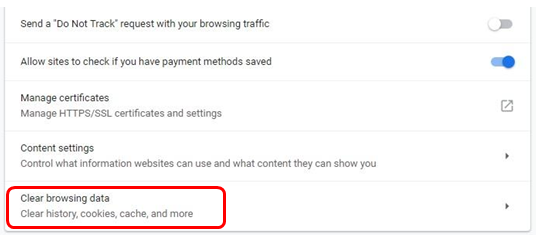
4. Select “Clear data”. (Note: Deleting cookies will delete the files you have stored on your computer's website, such as preferences and login data, so proceed with caution)
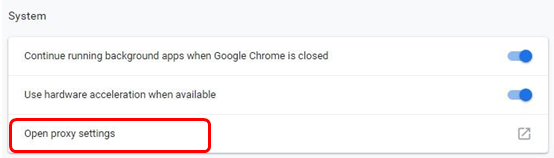
5. Select “Open Proxy settings”.
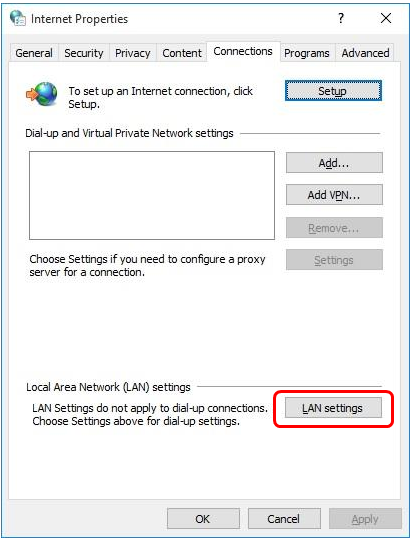
6. Select “Connections” and then select “LAN settings”.
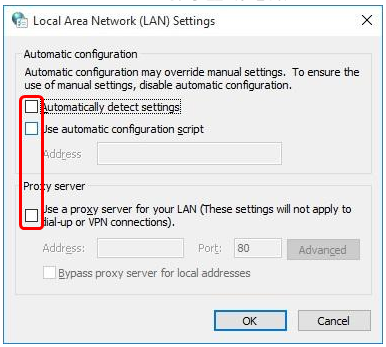
7. Make sure “√” is not ticked for all contents, then press “OK”.
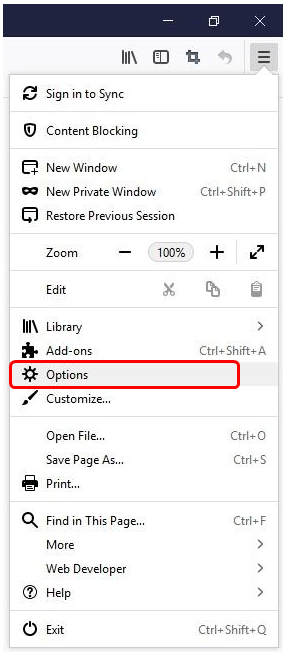
1. Open Firefox, select “≡ ” on the right and select “Options”.
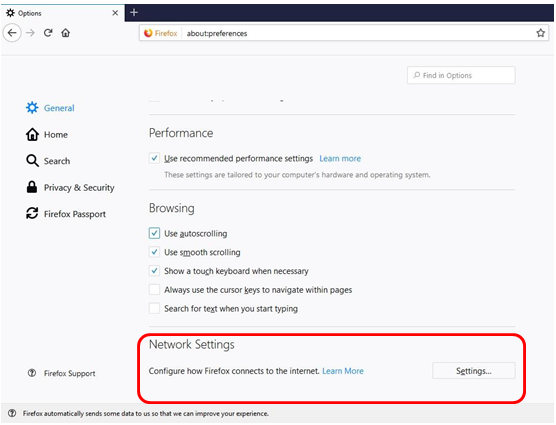
2. Scroll down to “Network settings” on the “General” page and then click “Settings” on the right.
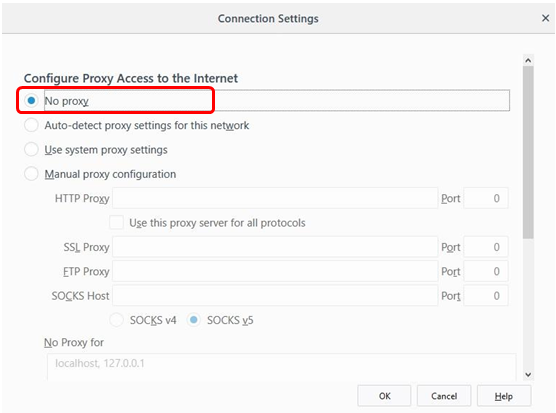
4. Select “No Proxy”.
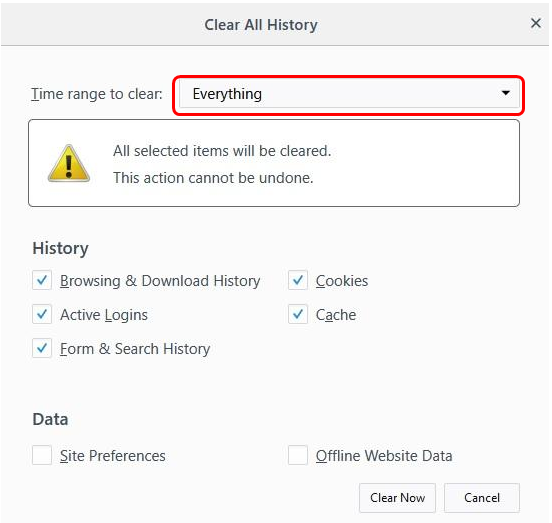
5. Select “Privacy & Security” and select “Clear History” under “History”.
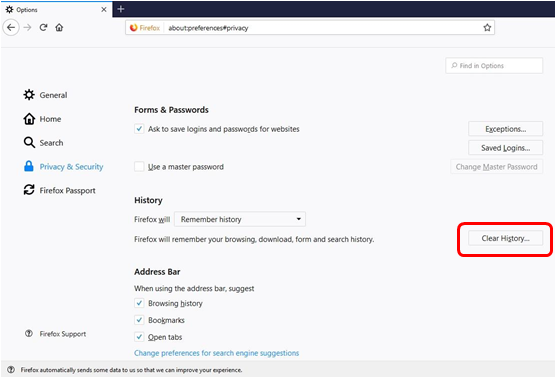
6. For the time range to clear, select “Everything” and then select “Clear now”.
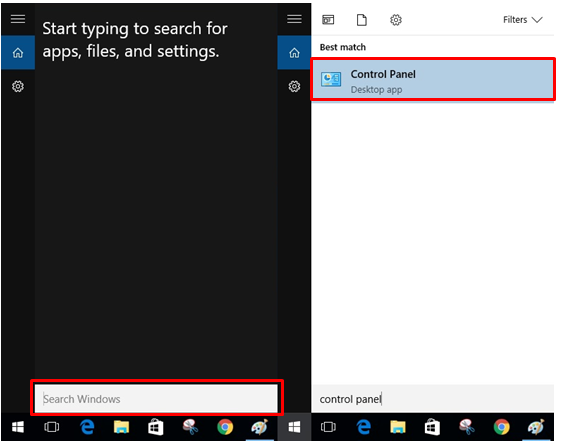
1. Click「Start」and open「Search」, input「Control Panel」in「Search」then open「Control Panel」.

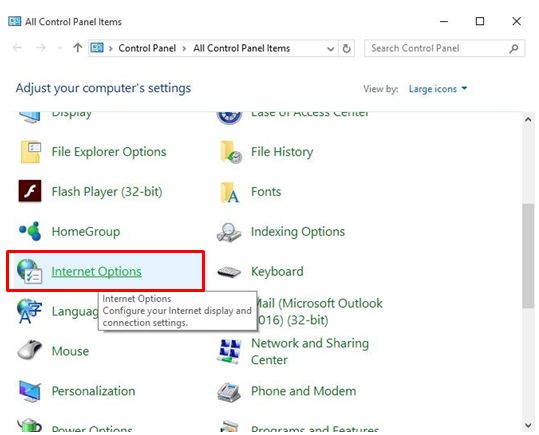
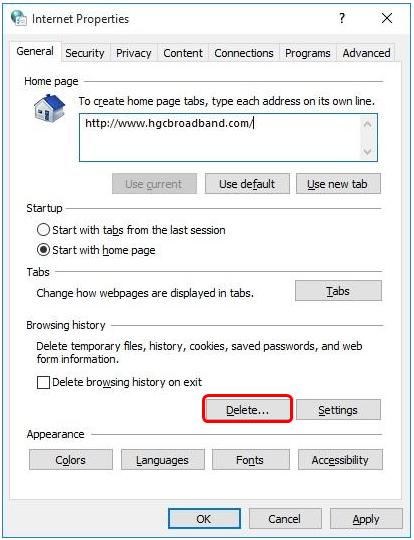
2. Open「Internet Options」.
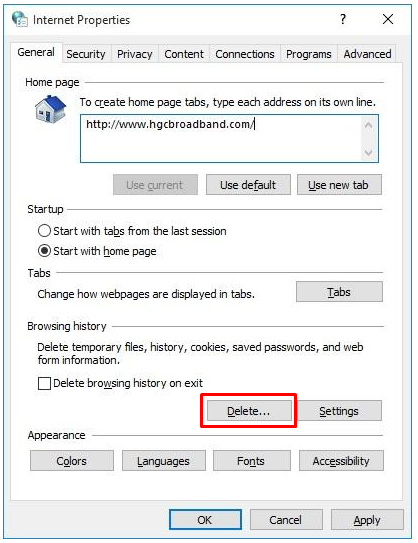
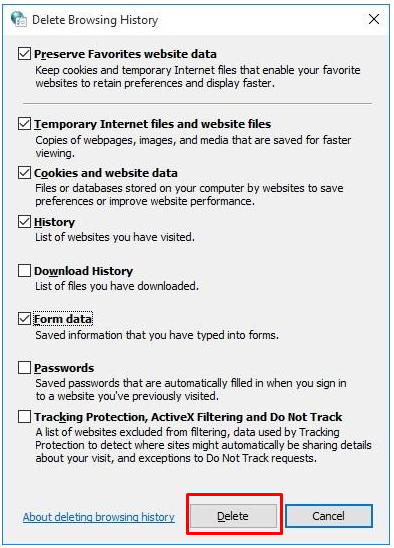
3. Open「Delete」.
4. Choose「Delete」again. (Delete Cookies will delete the data or files of some websites saved on your computer, please operate with care)
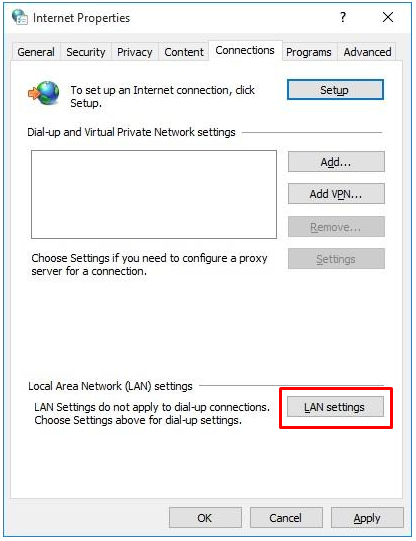
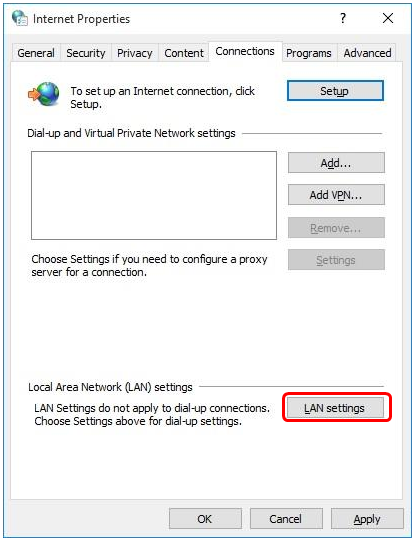
5. Then choose「Connections」and press「LAN settings」.
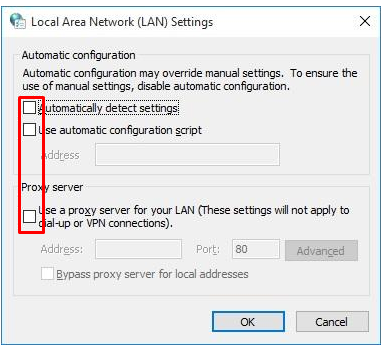
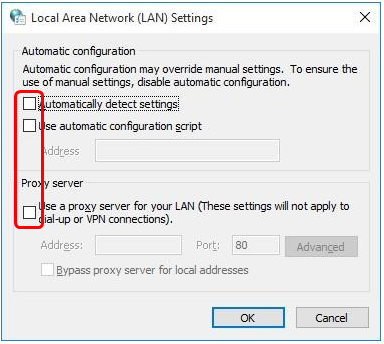
6. Make sure every check box is not checked then click「OK」.
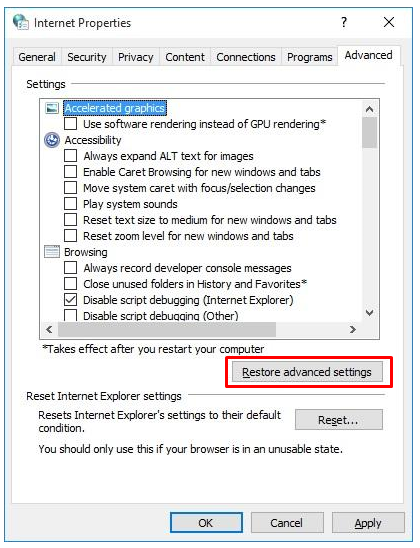
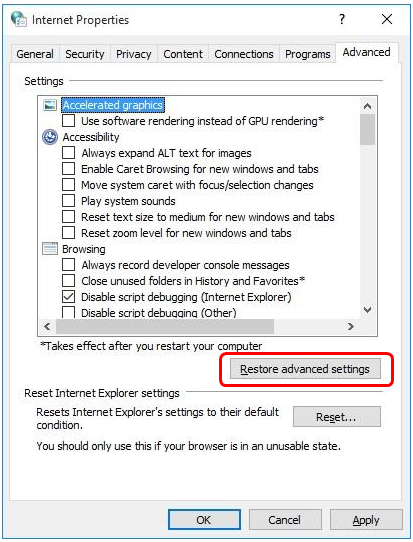
7. Choose「Advanced」and click「Restore advanced settings」then click「OK」.(Restore advanced settings will reset your browser’s settings, please operate with care)
1. Click the “Gears” icon at the upper right corner and select “Internet options”.

2. Select the “Delete” button.
3. Select “Delete” again. (Note: Deleting cookies will delete the files you have stored on your computer's website, such as preferences and login data, so proceed with caution)

4. Select “Connections” and then select “LAN settings”.
5. Make sure “√” is not ticked for all contents, then press “OK”.
6. Select “Advanced” and then select “Restore advanced settings”, and press “OK”. (Note: “Restore the advanced default values” will reset your browser settings, including browsing preferences, so proceed with caution)
Online Game Individual Website Inspection Steps
1. Press the Win and R keys on the keyboard simultaneously to open the “Run” window, enter CMD (not case sensitive) and click OK or press Enter.

2. Enter the command “Ping” + space + corresponding URL or server IP address and press Enter. Enter the command “Tracert” + space + corresponding URL or server IP address and press Enter.
(Takewww.yahoo.com.hk for example)
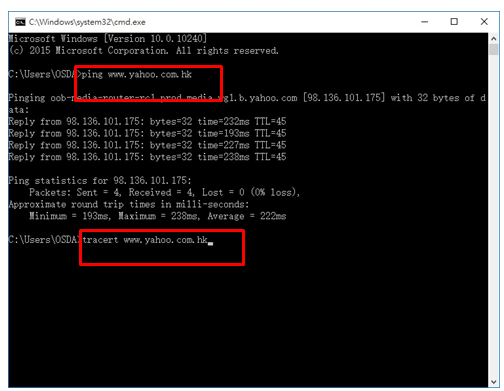
3. To enter the Tracert command will get more data. Please wait patiently.
4. After completion, use the following method to extract the contents.
1) Screenshot
a. Adjust the black window screen to the proper position so that the contents can be clearly displayed (if all the contents cannot be displayed in one page, please take two screenshots)
b. Press the “Print screen” key on the keyboard (it may be ‘PriScr’ on some keyboards)
c. Open the Paint program that comes with the computer, right-click and select “Paste” to paste the screenshot, then save.
2) Copy text
a. Place the mouse cursor in the white area at the top of the black window, right-click and select “Edit” → “Select all”

b. After all the text has changed to the white selected state, press “Enter” on the keyboard, and the text will return to normal state, which means the text in the interface has been successfully copied

5. Finally, please send your screenshots or copied text to the email address of our company's Technical Support Department (ncsp@hgcbroadband.com).
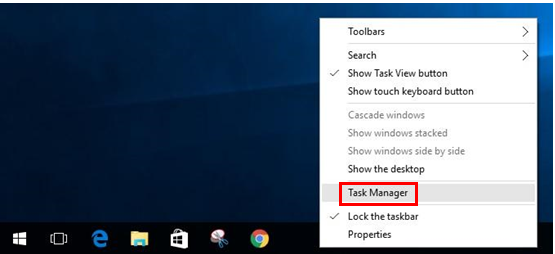
1. Right-click the taskbar and select the “Task manager”.
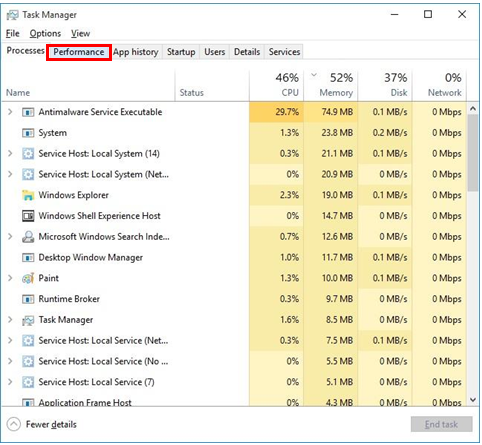
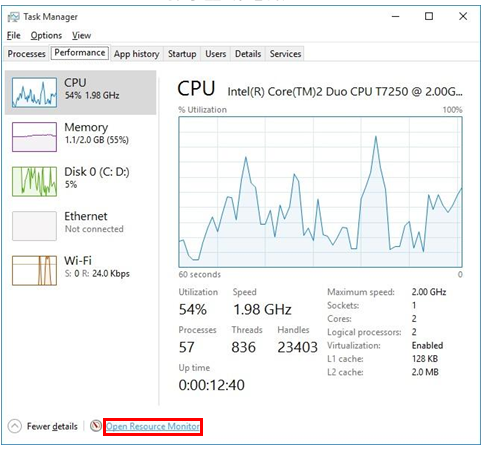
2. Click “Performance” and then click “Open the resource monitor”.
3. Then click “Network”.
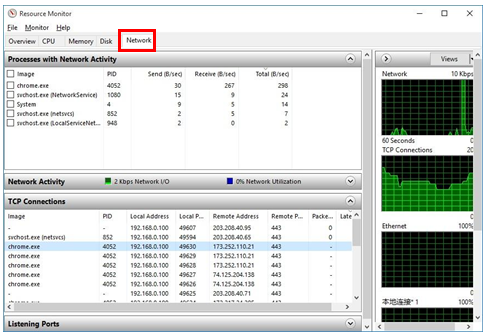
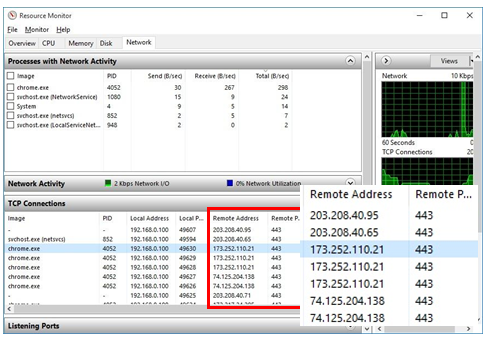
4. Click the arrow on the right side of “TCP connections” and open the detailed data page.
The remote addresses are the server IP addresses and remote ports to which the current programs are connected. Please record them.

5. If you are not sure what the name of your game / software program is, please look it up using the following methods.
Point the mouse cursor to the corresponding program, right-click and select “Contents”.
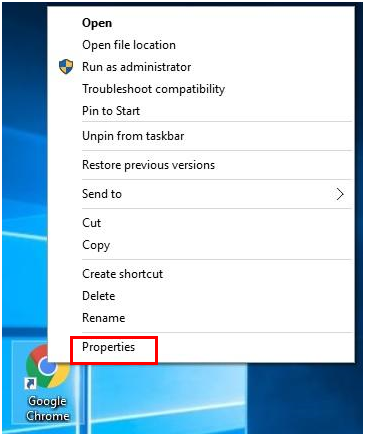
6. In the “Target” column, drag to the far right to check the name of the program.